
Like a well-kept secret passed down through generations, the art of freezing mashed potatoes ensures that the comfort of home-cooked meals is always at your fingertips.
You've likely spent a fair amount of time crafting the perfect batch of creamy, buttery mash, and it's only practical to want to preserve it. Properly freezing mashed potatoes isn't just about tossing them into the freezer; it requires a touch of finesse to maintain their texture and flavor.
Choosing the right containers and knowing how to portion them can make all the difference when you're ready to reheat. Stick with me, and I'll guide you through the simple, yet precise steps to make sure your mashed potatoes come out of the freezer as delightful as the day you made them, leaving you wondering why you hadn't started doing this sooner.
Key Takeaways
- Cook potatoes until tender, using varieties like Russet or Yukon Gold for a fluffy texture
- Use airtight containers suitable for freezing, such as freezer-safe glass or BPA-free plastic
- Portion mashed potatoes into single or family-sized servings for easy thawing
- Gently reheat thawed mashed potatoes on the stove, in the microwave, or in the oven, being careful not to overcook
Preparing Your Mashed Potatoes
To ensure that your mashed potatoes retain their comforting texture and taste once frozen, start by cooking them until they're perfectly tender. Potato selection is crucial here; opt for varieties like Russet or Yukon Gold, which are known for their fluffy and creamy qualities. These taters will stand up to the freezing process better than others, ensuring that your dish remains a family favorite even after thawing.
When you've got your potatoes cooked just right, it's time to think about consistency adjustments before freezing. If your mash is on the thinner side, consider adding a touch more butter or cream. This isn't just for richness—it's a practical step to help your potatoes freeze and reheat without becoming grainy or watery. Remember, it's all about achieving that just-right, velvety texture that'll feel like a warm hug on a cold day.
While preparing your mash, keep your movements gentle and your seasoning generous. You want to fold in those lovely flavors, ensuring every spoonful is as delightful as the last. When you've got it all whipped up to perfection, you're ready to move on to the next step: freezing your masterpiece for future enjoyment.
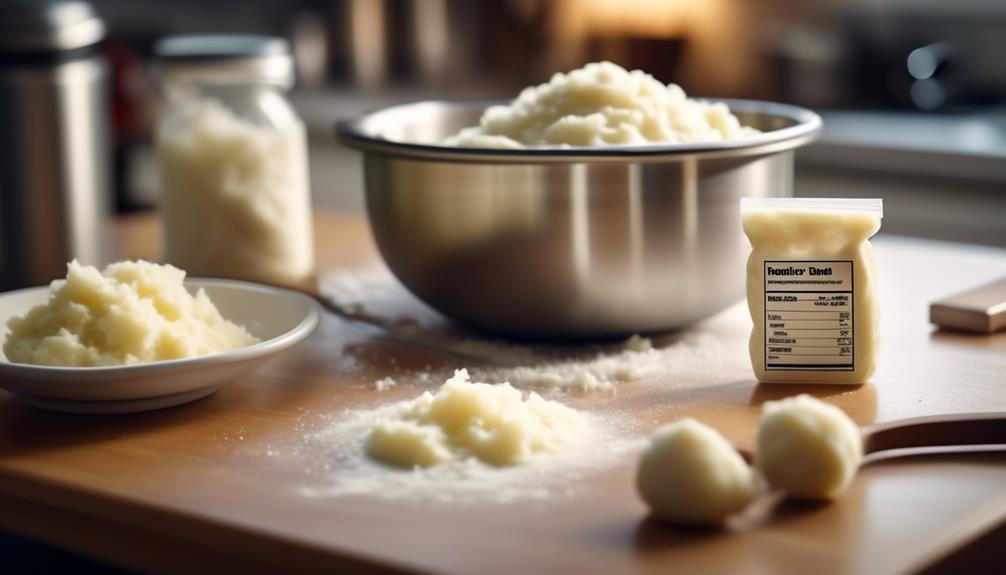
Choosing Suitable Containers
Selecting the right container for freezing your mashed potatoes is as crucial as the recipe itself, ensuring your spuds stay fresh and flavorful until you're ready to reheat them. Different potato varieties may have varying moisture content, so it's important to choose containers that seal tightly to prevent freezer burn.
You'll want to opt for containers that are both freezer-safe and made from materials that won't crack or break at low temperatures. Glass containers with airtight lids are ideal, but if you prefer plastic, make sure it's BPA-free and designed for freezing. Here's what to keep in mind:
- Airtight Lids: Ensure your containers have secure lids that keep out air and moisture.
- Stackability: Choose containers that stack well, saving you precious freezer space.
- Portion Sizes: Consider dividing your mashed potatoes into single or family-sized portions for convenience.
Don't forget to label your containers with the date and contents. Container labels aren't just about organization; they're about making sure you remember which batch of mashed potatoes is which, especially if you're experimenting with different potato varieties and recipes. Staying organized will make it a breeze to select just the right side dish for any meal.
Portioning for Easy Thawing
When freezing mashed potatoes, consider portioning them into manageable sizes that will thaw evenly and quickly, making your meal prep a snap. Individual servings are particularly handy; they allow you to defrost exactly the amount you need without wasting a morsel. Now, isn't that a neat trick?
To get these individual servings just right, scoop your mashed potatoes onto a lined baking sheet using a standard measuring cup. This way, each portion will be uniform, ensuring a fair share for everyone at the table. Once scooped, pop the tray into the freezer. Once the servings are frozen solid, transfer them to a freezer-safe bag or container. Be sure to label it with the date, so you'll know when you packed that creamy goodness away.
Using these freezing techniques, you'll find that your mashed potatoes retain their texture and flavor beautifully. And when it's time to enjoy them, simply select the desired number of portions and reheat. There's no need to thaw them all day; a quick warm-up will do just fine. You'll be dishing out cozy comfort in no time, with minimal fuss and no rush. Now, that's what we call smart cooking!
The Freezing Process
Having mastered the art of portioning your mashed potatoes, let's now focus on how to properly freeze them to preserve their delightful texture and taste. The key to maintaining that creamy consistency lies in the freezing process, which, if done correctly, can keep your spuds just as scrumptious as the day you mashed them.
Firstly, ensure your mashed potatoes are cool but not room temperature. This helps prevent the growth of bacteria. Then, it's essential to pick the right container. Airtight plastic bags or containers are your best bet for texture preservation. Press out as much air as possible before sealing to ward off freezer burn.
When it comes to ingredient selection, simplicity is your friend. Here are a few tips to keep in mind:
- Avoid adding dairy before freezing; it can separate and become grainy.
- Mix in a teaspoon of lemon juice or vinegar per cup of potatoes to stabilize and prevent discoloration.
- Use salt sparingly as it can draw out moisture and affect the texture upon reheating.
Reheating Thawed Mashed Potatoes
To ensure your mashed potatoes retain their creamy comfort after thawing, gently reheat them on the stove, stirring continuously to revive their homely warmth and smooth texture. Take your time, and let the love you poured into making them come back to life as they warm.
If you're short on time, microwave techniques can be a quick fix. Place the thawed potatoes in a microwave-safe dish, add a touch of milk or cream for moisture, and cover with a lid or cling wrap. Heat them in short bursts, stirring between each, to distribute the warmth evenly. Be careful not to overcook, as this can dry them out and spoil the delightful creaminess you're aiming for.
For those who prefer oven methods, preheat your oven to 350°F (175°C). Spread your potatoes in an oven-safe dish, dot with butter, and cover with foil to keep them from drying out. Warm them for 20-25 minutes, or until they're heated through. This slower process allows the flavors to meld beautifully, creating a cozy, heartwarming dish that's as good as the day you made it. Remember, patience is the secret ingredient here.